|
Process
Carved and Etched Glass
|
| Our work, the etched and
carved glass, is done primarily by sandblasting. Essentially, the
process involves taking a piece of plate glass, covering it with a
stencil material, transferring the design, cutting the stencil and then
sandblasting the exposed surface of the glass as it is revealed by
peeling off the cut pieces of the stencil. It is actually more complex
than that and I will go through each step in more detail.
|
|
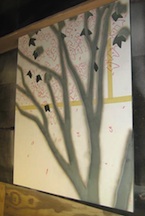
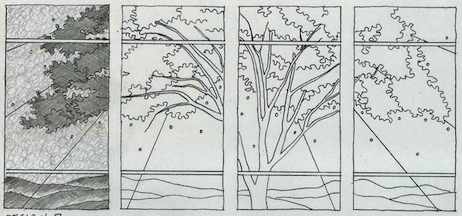
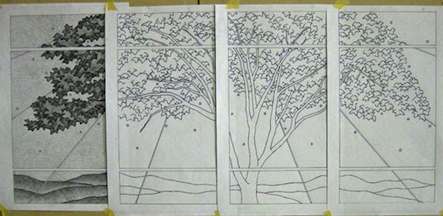
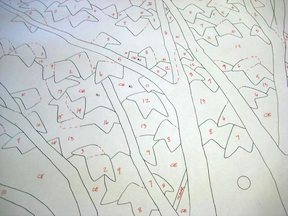
In any project, the art work comes first. I
start with a design consultation during which we look at past projects,
look through my design books, talk with the client to get a feel for
their likes and dislikes and the environment that the work will
eventually go in. I will do several compositional sketches in scale
from which the client will select. Then we will talk about techniques
for rendering the design in the glass.
|
|
|
After the design has been selected and
refined and the techniques decided upon, the next step is to do an
enlargement at 1/3 to 1/4 scale, adding details and cleaning up the
drawing. |
|
|
|
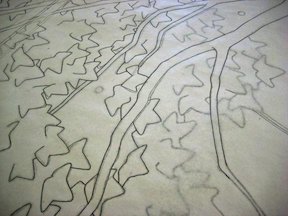
Finally, it is enlarged to full size and a
new full size drawing is traced. When the drawing is complete we take
it to a reprographics company and get copies made in the reverse. This
is necessary because the clear smooth side is actually the viewing side
so the design will have to be etched in the reverse.
|
|
|
|
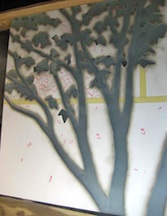
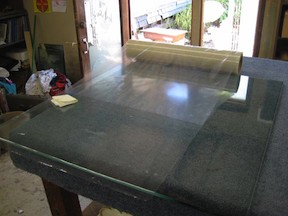
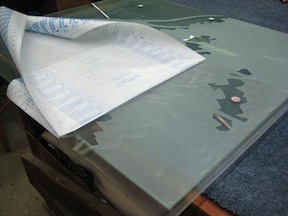
The first step in working on the glass is to
protect the reverse side from 'back blast' and scratches while the
piece is being worked on and moved around. To this end, we cover the
reverse side, which is actually the front side, with a thin clear
plastic tape.
|
|
|
|
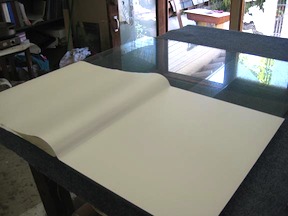
Then we flip it over and cover the worked
side with the stencil material, a thick vinyl that is adhesive on one
side. Once the glass has been covered with the stencil material, we
take one of the copies of the drawing and use spray adhesive to adhere
it to the vinyl covered glass.
|
|
|
|
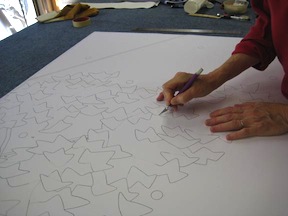
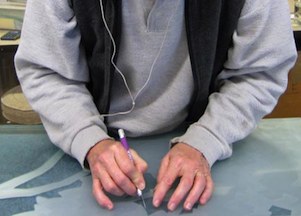
When the drawing is adhered to the vinyl
covered glass, it is time to cut the stencil. For this I use a hobby
knife with a #11 blade. Essentially, I am tracing the design with the
knife, cutting through both the paper pattern and the vinyl at the same
time.
|
|
|
|
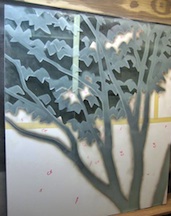
The second copy of the drawing will become
the diagram. The diagram is what tells Marc, who does the actual
etching and carving, the sequence for blasting, for peeling off the cut
parts of the stencil.
|
|
|
|
Once the stencil is cut, Marc transfers the
numbering from the diagram onto the stencil for easy reference in the
blast booth.
|
|
|
|
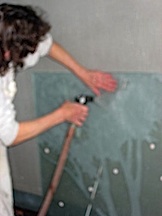
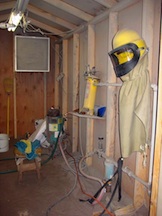
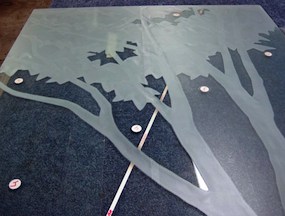
When the stencil is complete and the
numbering transferred, Marc takes the panel into the blast booth. This
is a small room since most of the panels we work on are too large to
fit into a blast cabinet. Marc wears a separate air supplied helmet
that due to the air pressure does not allow the dust to infiltrate into
his breathing space. This is essential since breathing the dust can
have disasterous effects on your health. He will peel off all the
number ones on the stencil and carve them to the appropriate depth,
then the twos, then the threes, etc until all the blasting is finished.
|
|
|
|
|
|
|
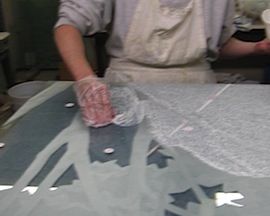
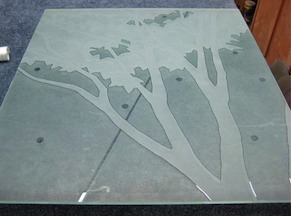
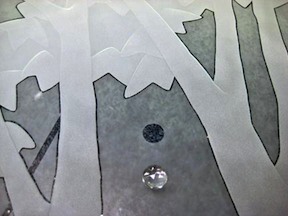
Sometimes, privacy is
required in a finished piece. When this is a requirement of the work,
the next step is to clean off all the stencil material still remaining
on the glass, cleaning it and then covering it again with a clear
stencil material.
|
|
|
|
|
Then I cut a new stencil
around the edges of the carved and etched design staying about 1/16"
away from the etching.
|
|
|
|
|
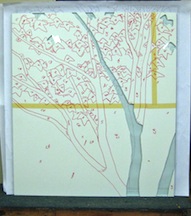
I remove the clear tape,
which is now covering the etched and carved design elements, to expose
the clear glass in the background. To obscure the background of the
design, or in some cases, add just a different tone and texture to a
design, I use a flouride salt based cream on the exposed clear glass
that gives a more satin etched look. The end result is a sandblasted
carved and etched design with a clear line around it and a satin opaque
background.
|
|
|
|
|
|
|
|
One of the other techniques
we use is applying clear textured glass and bevels and jewels to the
surface of the glass. This is a time consuming and complicated process
that involves using a UV setting optically clear adhesive. We also
create different textures in the sandblasting by using glue as a resist
applied in various techniques as well as blasting through open weave
fabrics for certain effects.
|
|
|
|

|
Finally, when all the etching
and special techniques are done, we apply a sealer to the etched
surface to help prevent dirt and oils from being absorbed by the etched
surface.
|
|
|
|
|
|
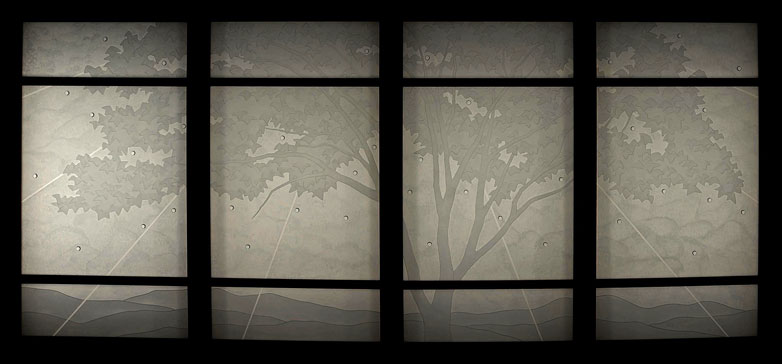
For more pictures and
information about this installation go here.
|
|
|
|
|